Showing posts with label House. Show all posts

10.19.2016

Tree Platform

Our yard does not have any trees suitable for a treehouse, but I (Craig here again) decided to make what I call a tree platform for the kids. It sits on the ground and wraps around a tree in our backyard by the chicken coop.


I took 4x4 cedar posts and notched them (see technique 3) a half inch to help support the girders (the 2" x 10" pressure-treated (PT) boards around the outside). I notched the posts so the floor of the platform is about 4' off the ground in front and 3' in the back (the ground slopes). Digging the holes for the posts was rather difficult, given the rocky (and rooty) condition of the soil. I mostly used a posthole digger, but at one point rented a two-man gas powered auger. I wasn't able to make too much progress with it due to the rocks. I got down to 27" for one hole and about 18" for the others. I put about 4" of gravel in the bottom of each hole and then put in the post and poured in concrete, using a level and one of the girders to ensure that the posts were properly spaced and the notches were level with each other. This was made more difficult by the fact that I built this platform on a slope. I had to trust the level instead of my eyes, because while the posts and boards were level, they did not look like it.

See how the vertical girders rest in a notch and are partially supported by the post

Before I set the posts, I applied these post collars at ground level. You can see them in the photo above right above the concrete - they are dark brown. They are supposed to protect this vulnerable part of the post against moisture, decay, and physical damage. I treated the tops, bottoms, and notches of the cedar posts with copper wood preservative, which I was actually unable to find in stores near me - I bought it at a Menards in North Dakota when I was up there visiting.

After I set each of the 2nd-4th posts, I attached a girder. I used two 4" fasteners on each side of each girder. These bolts are supposedly easy to drive and require no drilling, but in fact they were very hard to screw in all the way. I had to use my power drill like a screw driver, turning it manually while holding the trigger - that is probably bad for the drill. I spaced the posts six feet apart.

Once I finished the four posts, I attached two 6' 2" x 10" PT joists from the front girder to the back girder to help support the floor. I spaced each one about 5" away from the tree, figuring that it will take a good while for the tree to get that much wider. I used metal joist hangers to attach them.

 The joists and a joist hanger (at right where boards meet) viewed from under the floor.

For the floor, I used 5/4" x 6" PT decking cut to 77" long to give a bit of overlap past the girders. I notched the first board at each end around the corner posts. I cut the middle boards to go around the tree leaving a space of about 1.5" - close enough so little feet don't fall in, but far enough to allow a few years' growth of the tree. I figure that, as the tree gets bigger, I can remove these boards and trim them as needed. I attached the floor boards with 2.5" deck screws (the ones with a star drive head - they are easiest to screw in).


I nailed PT 2" x 4" rails around the platform at the top of the posts to prevent falls. I put a second rail on the front (high) side. I left the back side open - that is where I attached a 2" x 4" to the posts a foot off the ground to serve as a step.

In a couple of weeks, I will apply some sort of sealant to the wood (at least the PT stuff - not sure about the cedar posts).

The oak tree around which this platform is built has long, thin branches that hang low to the ground. I asked the kids if they wanted me to trim them back so they could see, but they like the way the branches create a canopy over the platform, so I left them alone.


The first modification I made at the kids' request was to pound some nails into the joists underneath the floor for them to hang their pots and pans. The first use they came up with for the platform was as a campsite, so they built a pretend campfire on the ground in front of it. This may be because I told them we could camp on the platform some night - perhaps this weekend. Lucy also wants me to put a partial roof and some partial walls on it; I may try to do that at another time - I need a break!

I am interested to see what uses the kids come up with for the platform. So far, it seems like they spend as much time under it as they do on top of it.



8.13.2015

Breezeway Stage 2 - Some Storage

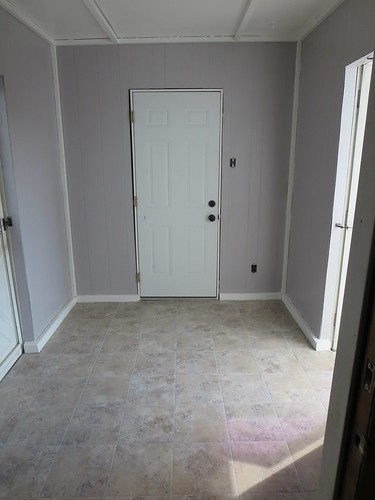
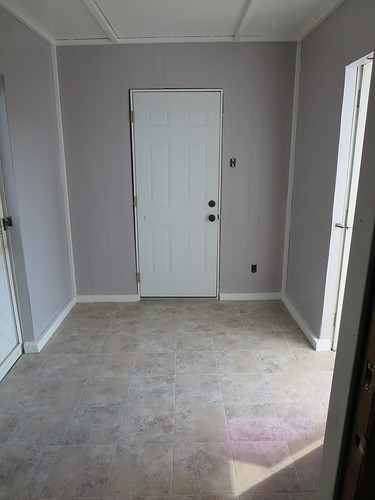
When we last saw our breezeway remodel project, it was looking like this. 

breezewayart 005

Pretty but kinda sparse on the practical stuff like hooks and storage as well as some finishing work like trim. But Craig worked very hard last weekend despite the heat and we made a lot of progress. 

This room is really hard to photograph because in order to get enough in the shot, I have to stand outside one of the doors so excuse the lighting issues. But I'm attempting to show that we:
  • Added door trim and caulked it
  • Switched out the black and transparent gold light switch and outlet for white ones. 
  • Replaced pineapple light fixture with a simple one from Ikea (can't find it on the website but I think it was about $10 so nothing fancy but less fruity)


Then we tackled storage. I wanted a place to hang coats as well as some bins. For the coat hooks, we painted 1x4s white and added coat hooks. The spot by the door only got a high rack for grown up coats since we'll be putting a bench under it while the left side got a lower level as well for the kids to hang their coats.  I'm sure in a couple months these will be loaded down with jackets and baby wearing devices but for now its just a couple rain coats, our pool bag and our nature tote.


For the bins, I knew what I wanted but it took a bit of finagling to work it out. We started with this 6 pack of galvanized bins which was just what I wanted and at a pretty good price. They are fairly deep so as we were thinking of what wood to try and piece together to make a deep enough shelf, I remembered the melamine shelving I used in our game closet. And yes, it comes in 15" deep! Of course, being that deep ruled out a lot of the fun brackets I had thought about using but I bought the cheap basic white ones and had Craig spray paint them hammered black to match the coat hooks (which technically were oil rubbed bronze but look pretty much black). I originally wanted to paint them the same teal/aqua that the door will be but since we don't know what color that is yet and I didn't want to wait, black it is. And I like the results. I'm not sure if you can tell but I still have to go back and touch up the screw tops to be black but I'll get to it eventually.


The spacing of the brackets is a bit odd because we had to work with the studs. It bothers me in the picture, but thankfully I don't even notice it in the actual room. And the storage! Two bins hold winter gear like mittens and hats, one had rain gear and another has our pool towels but I've still got two empty so when summer is over I can put up our pool gear and sandbox toys. I love the idea of not having quite as many seasonal switch-over tasks on my plate. I always seem to be about a month behind in those.

Up next on the to-do (which is quickly become more of to-buy list):
  • shoe bench (under the right side coat hooks) 
  • shoe cabinet across from that on the other wall. I've picked out the ones I want but have to wait for Ikea to open here next month. Not that my rubbermaid tote of shoes is not stylish, but it isn't very efficient when the kids empty the whole thing in search of one shoe.
  • recycling containers. None of the ones I see are big enough. We have a lot of recycling, especially paper. I guess we could take it out more often since the paper recycling bin is in our church parking lot but its enough to get us all dressed and to church without worrying about that every week too. I'll keep searching. 
  • the doors. With four in this room, it isn't surprising they take up a substantial portion of the work. I want to paint the new door aqua/teal, replace the screen door (which actually doesn't have a screen, or a handle or the ability to stay open anymore. It's a mess) and get a new door into the house (with a number keypad - my dream!)
  • a drop down drying rack - to hang our swimsuits and wet mittens on during their respective seasons. 
  • some more color in the form of art on the walls.
Of course, those are my full plans and it will probably take us a good year or two - or three if I'm waiting for that keypad :-) but baby steps! We've already checked off pretty much everything I hope to get done before the baby arrives with the exception of the shoe bench. For that, I'm just going to have to drag a chair out there because right now I'm sitting on the floor to put my shoes on and one of these days I'm not going to be able to get up again. At least I'd be stuck in a pretty spot. 

6.29.2015

Breezeway Stage 1 aka No Poop Allowed!


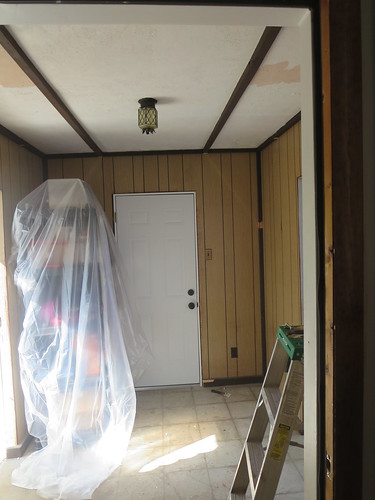
We spent this past weekend finishing up stage 1 of the breezeway remodel. It's a really akward space to photograph but here is it almost at the beginning, dark wood, wood paneling and falling down ceiling texture. Craig had already taken off some odd fake support pieces but you can see where they attached in the upper corner. And the possible asbestos tiles were removed before we moved in almost 5 years ago but their lines remained.

books 006

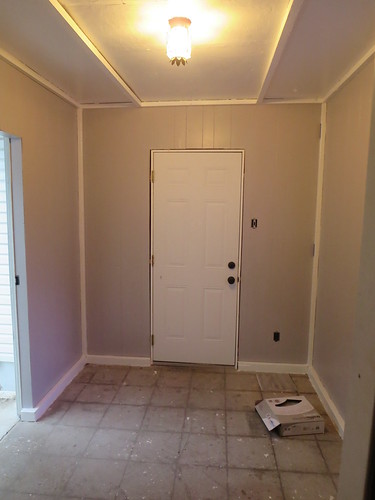
This is after Craig

  • took the texture off the ceiling
  • primed everything
  • painted ceiling and trim white
  • painted walls gray


breezewayart 002

Then I was up. I laid the main tiles Saturday afternoon and Craig helped me cut the rest and place them after the kids went to bed. It is not a square room to say the least (he had a heck of a time leveling that door) which made for a few annoying cuts but working together we got it done by 10pm which made me happy.

Also, funny story (don't you love diy stories that start out that way). We've had this tile in the basement ever since the bathroom project. After I used it there and liked it, I knew I wanted to get more matching tile for this room and since it was on sale and I was worried the pattern would be gone, we got it then, knowing we wouldn't use it for a while. Imagine my surprise when I opened the new box only to discover it was a different pattern. So I had half a box of tile that matched my bathroom and 2 boxes of a similar color scheme but very different pattern. Oh crap! Luckily, I really liked the new stuff, it had bits of grey but also more tan and I think it looked even better in this space than the old stuff. But I was still short about half a box. We tried thinking of a pattern that wouldn't look awkward but eventually Craig ran to Home Depot. And as luck would have it, they not only had it in stock (we had ordered this online) but they had some tiles you could buy loose. He bought all but the last one and we were only out about $15 in the end.  I'm just glad I looked at all three boxes before I had already laid the old. And that the new stuff matched my wall color, because I had color matched it to the old and there is no way Craig was going to repaint if it didn't go.

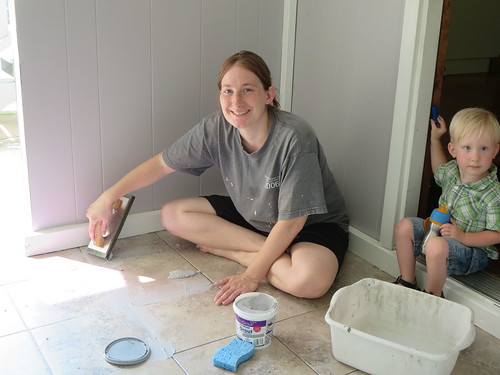
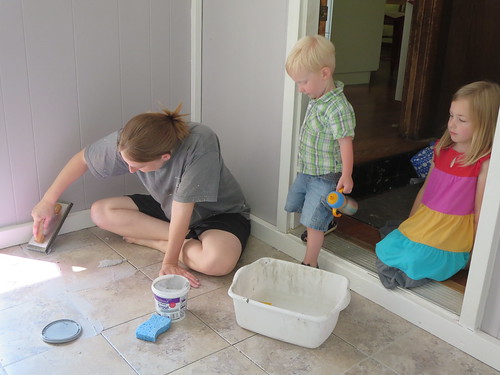
Then it was time to grout. Because apparently, grouting is what I do when I am 5 months pregnant. And apparently, I always steal Craig's clothes to do it, since I think I am wearing the same shirt of his in both pictures. But it makes sense. I have a very limited maternity wardrobe and there is no way I would risk getting grout on my one pair of maternity shorts. Those things have to last until September at least! But this time. I had more "help" overseeing my work

 breezewayart 004

breezewayart 003

But as of yesterday afternoon:

breezewayart 005

I love it so far! We still need to trim out the door, put a new light switch and outlet in and then figure out the organizational part to help with the functionality. And I'd love a new light fixture. I know pineapples are a symbol of hospitality but it's not really my style so how about I just say "Welcome" when I open the door. But already it is so much brighter and cleaner. I'm teaching the kids to be very vigilant about shutting the doors because for some reason, the chickens love this space and want nothing more than to poop in it. Which was annoying before but it now strictly forbidden. Because even with a pineapple on the ceiling, poop isn't welcoming to guests. 

8.26.2013

Deck the Deck

The next step in gussying up the front of our house, after installing a new front door, was to refinish the deck, which was long overdue. Here's how it looked to start with:


The paint - it was paint, not stain - on the vertical surfaces was in pretty good shape, but the paint on the horizontal surfaces was almost gone, and there was a lot of rotten wood. I replaced about 40 feet of the deck with new wood. After doing that, and before I realized the paint was paint, I tried to remove it using the Sherwin-Williams brand Deckscapes Stain and Sealer Remover, to no avail. Upon learning that it was paint, I tried Citristrip, which worked a little bit, but had a nice odor. I think it's an OK product, just not one suited for this job. Then I decided to just pressure wash the deck and stain over the paint that was on there.

I settled upon Sherwin-Williams DeckScapes Exterior solid color stain. I wanted to use a water-based stain for ease of cleanup, and I needed a sold color stain to cover the old red paint. I thought about using Behr Deckover, a new product that has been heavily hyped that covers everything with a thick layer of stuff. I normally go with Consumer Reports reviews, and CR likes Behr, but then I found this site that hates Behr. That site gave mid-range reviews of Sherwin-Williams, but did not rate the particular type I used. My color and water-based requirements limited my access to the best-rated brands on that site.

Sherwin-Williams is one of those places that has a sale half the time, kind of like Kohl's. If you watch their website or the Sunday paper, you can find their next sale period and save 15-30% on their products. If they aren't having a sale, wait a week or two. We choose a gray color to kind of match our roof.

But first I had to replace those boards. Not that the walking surface doesn't have a lot of paint left on it. I replaced more boards than what is shown here. Note that the boards that go across the tops of the railings are mostly removed.


Here's a summary of the staining process: It took a long time, I used a brush in order to work the stain into the wood (and into the cracks), 90+ degree days limited my working hours to before noon and after about 7 pm (you also aren't supposed to apply in direct sunlight), I used about 5 gallons of stain (but I have yet to apply a second coat to the walking surface, so I may have to buy more). Here's the result:


I later built some gates for each end of the deck, because when we put Jonah down out there, he heads straight for the stairs. He used to head straight for the outlet, put I put duct tape over the cover so he couldn't open it. Unfortunately, he seems to have already figured out how to open the gate latch.


I was able to build these gates largely out of lumber I had on hand. It is nice when, on occasion, my big stockpile of leftover lumber that I have saved from projects over the years comes in handy.

5.15.2013

New Door

One of the items on our long list of home upgrades to make was to replace our front door. We wanted to do this because the existing one was outdated and because it had a big window in the front. It seems to me that having a deadbolt isn't worth much if someone can easily break the window, reach in, and unlock it. Here's the old door:


This project was rather low on the priority list, but I went to a going-out-of-business sale at a hardware store that had a number of doors available at low prices. After learning that my existing door was left-handed (the knob is on the left if you are facing the door from outside), I checked out their selection. Finding one that looked suitable, I then had to go home and measure my door to see if the measurements were similar and if the bore holes and hinges lined up. The doors were the same size, but the knob and deadbolt holes were not in the same places. But eh, I figured, I could chisel out the door frame to accept the new door, so I bought the metal six-panel door I had my eye on.

Our first task was to paint our new acquisition. There is a house not too far away from us that has a yellow door, and we liked it, so we decided to blatantly rip off their idea. We went with the "yellow mustard" shade of Valspar Duramax in exterior semi-gloss (it really does look like mustard - if I put it on your hot dog, you'd eat it). They say to use interior paint on the inside of the door, but I'm not buying two cans of paint. I figured that, since metal doors are primed, I could just go ahead and paint the door after cleaning it off. So I applied a coat of paint, and then one more and one more, to one side of the door, but it just wasn't giving me complete coverage. So I belatedly took to the internet to do some research. I discovered that a primed door is not, in fact, paint ready. Apparently the primer they apply to doors is weak sauce. So I decided to flip the door over and prime the other side.

After a coat of oil-based Kilz primer, I applied a total of four coats of paint, and it was acceptable. So I flipped the door back over, primed it, and gave it 3 coats of paint. Then I was ready to install hardware.

We went with a Kwikset handleset. Along with the high security rating and nice looks, these have a feature that allows you to easily re-key them. This makes it easy to make all of your entrance doors openable by the same key. It looks kind of like this:


Now, something to note is that the bottom part of the handle there needs to be attached to the door with a screw of its own. The screw can be visible from the outside, or it can be hidden. If it is hidden, you have to drill through the other side of the door, and then put a decorative cap over the screw. However, there are no photos on the entire internet of what this looks like. I wasn't sure I was doing it right, because I could find no evidence of the handleset having been installed this way. But that's how I did it, and here's a photo. The internet is now complete. Note the little brown circle below the door handle (click to enlarge).


After getting the door hung and the hardware installed, I had an issue with filling the gap at the bottom of the door. Any devices designed for that gap that I could find were too large, and I didn't want to go with one of those draft stoppers, so I just put a strip of the weatherstripping stuff you put between the door and the jamb on the hinge side. It was self-stick and 1 1/2" wide by 1/4" thick, and it fit just right.

8.30.2010

...and then they bought a house

Yep, you read that right. We put an offer in on a house this Friday and Saturday it was accepted!

But hmm, do you remember us talking about buying a house, finding a Realtor or looking at any houses? Nope? Well, it's not because you weren't paying attention.

Craig and I had talked about buying a house and had looked around our area and set a budget and a timeline that seemed to work well with what we thought the economy would do and our plans for the few year. But we weren't even going to start looking until 2011. Then a friend's neighbors were moving and so she (the friend) put up the house listing on her Facebook wall. It was priced really well and looked cute except for the kitchen which was super small and way outdated so after spending maybe 10 minutes looking at the pictures online, we went off to other things without a second thought.

Until about 5-6 days later after I had kept thinking about it. Finally, last Saturday I broke down and asked Craig if he thought maybe we should at least look at it. He jumped at the idea! We made an appointment to view it on Tuesday and in my heart I just "knew" that I wasn't going to like it as well as I thought and it was going to be waaayy to small and that would be that. But that wasn't that.

Long story short, one week later and unless something happens with the inspection tomorrow (cross your fingers!) or the financing, it should be ours by the end of the month. It seems fast to us but we prayed about it and really do feel like God just handed us this house. And like my mom said when I called to ask if this was wise, "Sometimes you just gotta jump when the Spirit says jump."