Showing posts with label Crafts. Show all posts

8.25.2017

Friday Fun day

We used to have Fun Fridays all the time and have a relaxed school day and do adventures just me and the kids on every other Friday (and all together on the Friday's Craig has off) but those sorta morphed into our nature study days since Fridays are when our group met up. That stopped and then we restarted school and it became a regular school day again these past 6 weeks without my even noticing. This week I planned for us to do something - and it didn't work out but it prompted my memory. We needed to have a fun day!

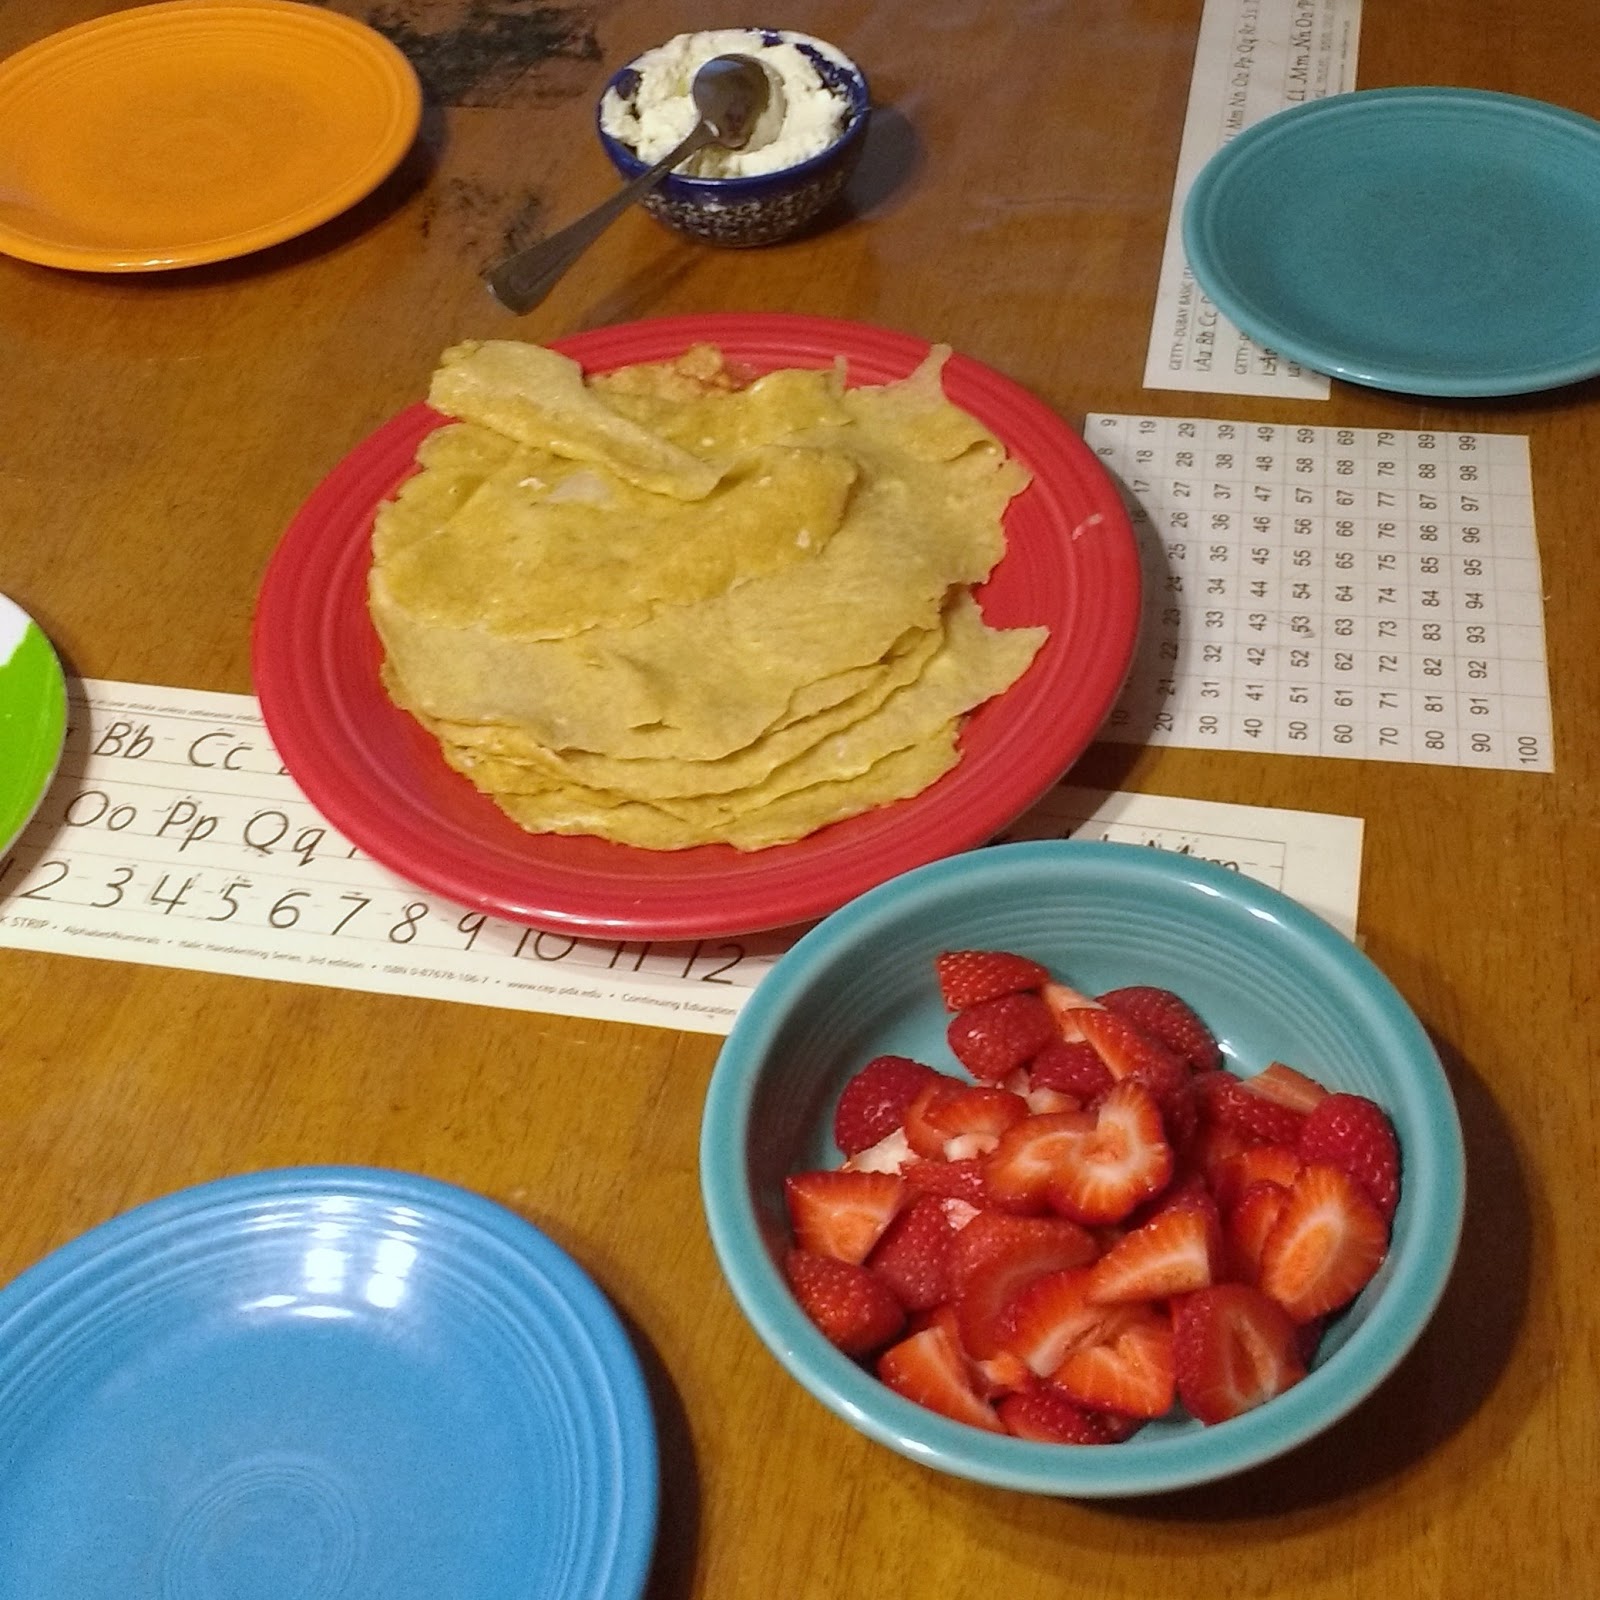
We started with an extra fun breakfast of sour dough crepes. This is the easiest sourdough recipe I've done so far and it was a huge hit! We'll be making them again for sure.


We did do a tiny bit of school. Jonah had just gotten his new math and was super excited to try it. I went with Miquon. He's finished MEP Reception and is more than ready for a first grade math - and he wants math daily if its an option!  (I only do school on request with 4 and 5 year olds). I have MEP Year 1 all printed and ready but I wanted something more hands on since he's so young. We did the first page which was understandable fairly simple and he went along with it but then I went forward a bit and he really liked it. He told me "Mom, I just feel like my brain is getting the right math exercise now"...how cute is that?! It's been about 4 months since he finished MEP and I've held off and tried to get by with just his little Rod and Staff preschool books which have a bit of math in them but clearly he missed it.)

Lucy and I did a short math lesson and the last AO readings of the week. I had expected to be fitting these in around stuff so I made sure to leave her favorites for today (Wind in the Willows and Pilgrim's Progress) and we had no problems getting that done.

Then they played and played and impatiently waited for quiet time. Before you think that is a misprint, I have to tell you that they knew we had something fun planned and my kid's love nothing better than something labeled A PROJECT. This one really needed to be toddler-less and that meant we had to wait for Norah to nap. They were practically begging me to put her down at 10am. If only it worked that way kids! You are probably lucky it doesn't some days. Finally she slept and we painted peg dolls!


While they worked on theirs


Jonah's. 


A few of Lucy's. I really like the little penguin in the middle. 

...I did some special requests. I hope most of them are recognizable but I'll tell you so you don't hurt my feelings by asking ;-)


Wonder woman and Moana


Spiderman and Iron Man. I had plans to add more black to Spiderman but Jonah likes him as he is and I'm afraid I'd mess it up. 


Norah did not actually request these but I knew she'd be upset if everyone got some except her so these are based on one of her favorite books, Children of the Forest by Elsa Beskow. Not to be confused with whatever Game of Thrones thing that came up when I tried to search for that book. I have no first hand knowledge of GoT but my guess is that what that is referring to would probably not be appropriate for a children's toy.

You'd think that would have been enough fun for today but we quickly made banana bread and headed off to finish up Lucy's Family Helper Badge for American Heritage Girls. She had planned a fun family activity for us all - a hike and picnic at a neat local park. I snuck in a bit more school as we listened to a podcast about our current composer Telemann on the way there and Chronicles of Narnia on the way home. I'm a bit worn out so I'm not sure if we'll be cramming this much fun into every Friday but we all really enjoyed our Fun Friday and I'm sure it won't be our last.

9.19.2015

In the nick of time

Jonah turns 3 tomorrow. Since he is getting plenty of toys from family, I wanted to make him some clothes. Actually, I would have made him the clothes anyway but since his birthday is this month, I figured I'd make them into a present. Of course, that gave me an even more imminent deadline than the new baby's coming one.

But I made it! I finished up the last sweatshirt I planned last night. That particular sweatshirt isn't in this picture because I tweaked a few things on the pattern and wanted to test fit it on him and it ended up being peed on. Life with a boy :-)

And technically, I realized I had just enough green for short sleeves so there is green and black raglan tee cut out but I need to go buy matching thread to finish that up. But what I had planned is done and that's what counts.

In addition to the green/black shirt I will be adding, I'll be on the lookout for some other basic type prints to be added to this set - black and white stripes or stars or things like that. I still have a bit of pirate fabric and lots of the black. And I actually have a black and white stripe maternity maxi skirt that I think might be turned into a couple tee shirts once I no longer have use for it. Kid sewing - it's an addiction!


He's getting:

  • 4 pairs of pants - all based on the cuffed waist harem pattern but I experimented a bit. For the red pair I slimmed the legs a bit, lengthened and just hemmed, they can be worn down or rolled up once or twice. The green ones I added length the the pants and shortened the cuffs and I think that is my favorite for "older" boys. One of the grey pairs is standard and the other is a bit slimmer. That one wasn't so much an experiment as it was an accidental snip of the fabric on the legs. But it works either way. I gave him one pair of the grey pants last week and he's already worn them several times. I love the look. Not too crazy harem-ish but roomy and flexible for climbing and bike riding. 


  • Two raglan tees. The red and black raglan tee I altered to be 3/4 length but I stuck with the pattern for the black and pirate. I've also made him another raglan that matches on of the baby's outfits and either the grey or red pants. Which of course means he will try and wear it with the green pants
  • A raglan scooba hoodie is the free pattern. I did the optional arm seam detailing and it was a stretch for my abilities so it looks a but more handmade that it would without it but I'm trying to improve my skills so I'm glad I tried it and Jonah won't care. 
  • A hoodless hoodie (black and grey, not shown because of aforementioned pee incident) was made from the same free pattern but I made my own neckline. I'm not totally happy with the result but again, Jonah really liked it.
  • The slouchy beanie is my only non brindille and twig pattern piece. I used this free pattern and it looks huge but actually fits both him and Lucy well. He tried it on and said he liked it but would only wear it when it snows. Maybe I can at least convince him to wear it for a picture. 

The grey and pirate fabrics are french terry and I think french terry is my new favorite thing ever. It's just so soft I want to roll around in it. Jonah loves it too. The one pair of pants and the sweatshirt he's tried on have been big hits. The calls them "my softy clothes, because they are so soft I love them so." I just adore the pirate fabric. Its a very close match to the blanket he sleeps with and luckily it was a remnant so it wasn't ridiculously expensive and just long enough to make the shirts. I still have enough for another 2T or 3T shirt or, if we have another boy, maybe a matching baby shirt/hoodie or two.

The red and green are cotton/spandex jersey knit. And the black is 100 cotton% jersey knit from target sheets (a very inexpensive way to get knit fabric, especially if you are just looking for a basic solid color!).

Now I need a nap.

8.14.2013

Almost there.


fairypussywillow 005

fairypussywillow 001

Overall, I loved making this doll. While researching my green baby purchase I stumbled upon several blogs and forums recommending making over buying but at the time it didn't appeal to me at all, I just couldn't image even trying. But this really wasn't difficult at all and only took me a little over a week of working on it in the evenings while Craig worked and the kids slept. It did mean I had to move to american tv since I couldn't work and read subtitles but that's a smalls sacrifice. And Lucy loved waking up each morning to see the progress. 

I used this weir doll kit and I did go ahead and purchase a pre-made head. I think it was a great choice, it made the whole doll making experience a lot less stressful. And despite the images on the website seeming a little old fashioned,  there is so much flexibility that your doesn't have to look like that. I spent a lot of time browsing waldorf dolls online to find what I wanted, probably more time that I spent making her. But it allowed me to customize what type of smile, eyes, what type of hair yarn, what style of hair. 

I was planning on making her blond but Lucy really wanted her to to have brown hair like "green baby" did so I relented. 

I gave her a slight smile to make green baby. 

I didn't give her a nose even though they are very cute because I've heard they were out very quickly and green baby's face is a totally different color than it was (you can lift up the hat a bit you can see the difference) and I'm hoping this one gets as much use. 

I was very particular about eye size and spacing. I couldn't figure out why I was turned off from several ones I saw by wide big eyes. They looked creepy to me. That's just personal preference but I didn't know until I saw a lot.

I went ahead and did a crocheted wig cap. Reading about the different options it seemed like this would be a pain and right now Lucy isn't into styling hair but I would have been frustrated with myself if I didn't do it so I bit the bullet. BUT this was really quick and easy in the end so don't skip this step to save time, it's not hard and makes a big difference. I wish I had made it a bit bigger so it went farther down on the neck but that's just something to remember for the next doll. And yes, I want to make another one some day!

7.17.2013

Table #2

In the comments back on this post, Elaine thought my room needed more color and I agreed. I really wanted a yellow table. So I painted the other one!

julyfun 022

The table was a dark stain with a really shiny finish but it was really beat up - hence the tablecloth. But the table was Ethan Allan and in good shape beyond the surface. I tried the diy chalk paint recipe that involves mixing plaster of paris with water then adding paint. The yellow is the leftover paint from our new door project.

I had a few problems. I'd never worked with chalk paint before so I had trouble getting the right consistency, my first coat or two was really thin and barely covered anything but the next batch was too thick and starting getting chunky. I finally figured it out but by then my table was quite, uhm, textured in places. The second issue is related - the dark cover was really hard to cover. I had read that chalk paint doesn't need a stripped or sanded surface to start with but that it helps to do so anyway if you have a dark finish. So I did a light sanding - only to later read on a different blog that it can be really hard to cover a dark stained surface if you sand it before hand. Well, that would have been nice to know earlier!

At this point, I was annoyed. It just did not look good. I wasn't really upset because I went in to this project knowing I couldn't really lose, I could always just put the tablecloth back on. But I really wanted it to work! I ended up sanding it to remove some of the bigger texture marks and giving it a few coats of paste wax and it started to grow on me. By the time I got it inside where it could in the corner instead of staring at it, the issues disappeared and now I really like it.

julyfun 027

And to be fair to the method, we had issues with the yellow paint not covering the door well too so I think it also might have been an issue with this particular paint. So I'm not jumping on the chalk paint bandwagon just yet but neither am I giving up on the idea. If I do decide to try it again, I might try a real version at least until I know what I'm doing.

Although that pictures above is a bit deceiving, 30 minutes after the table was in place, it already looked like this:
julyfun 023

Even more reason to ignore the imperfections and appreciate the pop of color.

5.20.2013

New Pillows!

It really is the little things that make a differnence, isn't it. I've been meaning to get new throw pillows for a while and earlier this week, I finally got around to it when T.J. Maxx happened be right next door the the restaurant Craig took us to for Mother's Day. And T.J. Maxx is the place to go for pillows.

First up is the bedroom. I scored this guy on sale for $13.00.!


I know, I can hear you all now "It's so you, MacKenzie, you love polyester so much and that pattern just contains all the bright colors and geometric patterns you are so fond of." Okay, not so much. But I know the secret to good pillow and that's feathers. A feather pillow is a plump and squishy ball of wonderfulness. Once you're used to it, a fiber pillow is worthless. Try it but beware, you'll never go back. Unless you're allergic to feathers and then well, I'm sorry, that stinks. So to repeat:


In this case I already had the fabric picked out (it had actually been sitting on my dresser since I made those curtains - both fabrics are Amy Butler) so I found the cheapest one that was the shape I wanted. And boy was it ugly. So ugly I wanted to tell the cashier that I was only buying it for the insides, I had better taste than that but I didn't because that seemed weird.

 But 10 seconds later I had zipped off that cover and trashed it. And 15 minutes later, my bed looked like this


 except darker and sans horse because I did this 9pm when the kids (and horsey) were safely tucked in bed but took the pictures this morning when they were awake.

I also picked up pillows for our couch. I had two pillows on it originally that had come as hand me downs with the couch. They were nice pottery barn covers and they actually matched the room fairly well but I happen to know that they were one of Kip's (you know, that dog) favorite spots to rest. He would jump up on the couch then sit on them and wiggle his butt on them until he was comfortable, then spin around and rest his head on them. I had washed them several times but the memories lingered and nothing inspires me to relax like lying down on a butt pillow. They had to go.

I took one form to use for the dark blue pillow above and was thinking I would just find another one the same size and make new covers for the couch but I found really cute ones, down filled of course, so I didn't even have to bother.


 The teal and tan pillows are from T.J. Maxx and the other is original left over. I was determined to use it so I rummaged around in my fabric bin and found a burlap sack from my brother's wedding. It happened to be just the width of the pillow so I stuck in in there and tucked the extra flap inside. No sewing necessary! I've seen a lot of people use a sharpie to embellish their burlap pillow but I would only be allowed to do that if I could come up with something Craig would approve of. Nothing cute or sentimental like "Live Laugh Love" or "L Established 2007" would pass muster.

The couch ended up matching the red in our rug pretty well and I'm glad to be rid of the $50 saggy striped monstrosity we had been living with but the red leather is a bit dark. I think the pillows help cover that up a bit, more so in real life than in the picture.

Of course, seeing this picture reminds me that the new couch is also quite a bit longer than the old one so I really need to add something to the wall. Luckily, I just read through handmade walls and have found the perfect project to go on either side of the shelves. Just don't tell Craig it requires a saw. He's still working on another project for me and I might have a mutiny on my hands if that gets out ;-)

All together the three pillows and fabric cost just over $50 which I think is pretty good for 5 non-butt feather pillows.

11.09.2012

Montessori Baby: Octahedron Mobile

Jonah got a new mobile a few days ago after the last one met it's unfortunate demise during a tantrum thrown by a certain toddler. She's still asking for daddy to try and fix it and it should be pretty easy for him to do so but I'm debating whether or not to actual try. If we do, we'd keep rotating them every week or two to keep things fresh but I might want to to let natural consequences serve a purpose. She was pretty upset that she ruined Jonah's mobile but he wasn't - he loved this one! 


He really seemed to like the blue one. These pictures were taken around 7pm which is normally the time of day when he has to be nursing, worn in a wrap or constantly bounced or he is fussy which is how I knew how big of a hit it was.


This was also one of the cheapest and easiest to make using the template and tutorial from Little Red Farm. I already had the dowel and clear string so it only cost $1.50 for three pieces of scrapbook paper from Hobby Lobby. Definitely worth the effort!

7.31.2012

Big Sister Sewing

When it comes to my accomplishing sewing tasks, inertia really is key. I'll put off even simply sewing tasks for months but once I get the machine out and set up, I'll get on a roll and start sewing everything not nailed down. So when I had Craig carry my machine upstairs last week so I could hem our new curtains, I was pretty sure what was going to happen so I made sure to have all my supplies ready and yep, I got everything done - and more!

My goals were curtains hemed, beanbags sewed, and some baby doll diapers made. I'll show you the beanbags later but here are the diapers - aren't they cute?


I used skiptomylou's pattern but I ended up enlarging the sides and using bigger pieces of velcro so Lucy wouldn't have to be so precise. The last thing I wanted was another "baby" that needed me to attend to its diapering needs. The fabric was just scraps I had lying around - quilting cotton on the outside, flannel and knit on the inside. 


My favorites are the pinks, the inside is an old nightgown I cut up. I'm waiting to give them to her until it is closer to Dewey's arrival but its so hard because I know she will love them. After that sucess, I added another project - a kid-sized ring sling and since I haven't really seen any tutorials for this only, I thought I'd share how I did it.
The only tricky part of this is getting the rings. I happened to have about 40 metal rings from when I bought curtain clips for our living room bay window but only needed the clip part. That was last year and I kept them because I just knew I could find something to do with them and finally I did. But even if you don't have them on hand, they aren't that expensive. Target has a set for $6.39 and it doesn't say how many are included, but I'm sure there would be enough for several slings so you might even be able to find another mom to go in with you or you could do what I did and end up having so much fun you make 4 slings! (Don't worry, Lucy's only getting one, the others are going to some other little girls I know). My rings measured about 1.5 inches in diameter and that worked but a slightly larger ring would probably work even better.


 The only other thing you need is a piece of fabric 10.5 in x 45in. This is approximate too. I just estimated based on my ring sling - mine is slightly taller than me, so I made Lucy's slightly taller than her but you could probably adjust it slightly without harm (but alas, I wouldn't go down to 36 inches no matter how tempting it would be to get away with only using 1 yard of fabric, there just won't be enough of a tail). I used a quilting weight cotton but anything light weight would work. Even a knit would probably be fine since safety isn't a factor. And part of the "wrong side" will show so if you care about that, pick a fabric that has a subtle wrong side.

Start by heming the rectangle on all four sides. 


Then lay it flat, wrong side up, and slide both rings onto one end.


Fold over that edge a few inches, right sides together and sew the end down. I just followed the hem line.


And that's it! It's really easy. Perfect for walks around the house or when baby needs attention but tea must still be served.


Of course, I'm assuming that you know how to use a ring sling since you care enough to make your kid one, but if you don't, check out Youtube, there are lots of tutorials. Between the fairly grippy cotton and the small ring, I don't actually have to adust Lucy's very much so I help her put it on one arm (she always tries to put both arms through but that doesn't work) but she can take it from there. 


This should go without saying but I'll say it anyway, these are directions for a child-sized carried meant to hold a doll, not a real baby. Because of that, I've left out a lot of the safety features a real ring sling would have so please do not size up these instructions to make a full sized ring sling. It wouldn't be safe or comfortable. There are lots of ring sling tutorials out there if you want to make one for yourself. 

12.12.2011

Advent is upon us

We're getting a little bit of a late start on Advent since we just got back into town last week but Craig and I just didn't fill Lucy in on that fact and since she can only count to one, I think our secret is safe.

I've been thinking and planning for Advent for a couple months now and forcing Craig down to think and plan with me for several weeks. I really want to thoughtfully consider what traditions we want to incorporate instead of just letting Christmas happen to us. I've always felt that way but Lucy ups the ante. And I also know that this holiday period is going to be hard on me so I think I'm not so sub-consciously hoping that if I stay busy, I won't notice that my mom isn't here. I don't really think that plan is working, but I'll try. It might get easier this week since my dad arrived last night and my brother will be flying in as soon as he wraps up finals week at A&M.

So here are the things we've been doing this advent season:

Bags with activities/treats:


I saw this on pinterest and knew I could make something similar so I ordered muslin bags and a number stencil from Amazon. (Note: don't depend on your local Hobby Lobby to have number stencils - mine didn't :-( I originally wanted to hang them on a branch or dowel but I ran out of steam so this year they just went into a basket. Next year perhaps.


At this point, Lucy doesn't really get the countdown part but having the calender planned out helps ensure that the really important stuff that I wanted to make sure happens, actually happens and doesn't get crowded out by last minute, not-as-crucial, activities. So far, I love it. The bags give me lots of options. I've tried to focus on activities but I do have a toy in the bag for the day we fly to Grandma and Grandpas. Here are a few of our bags:
  • Make St. Lucia crown - bag contains pre-cut paper
  • Make treat for the birds - pinecone (with pb, birdseed to come later)
  • Shop for Christmas tree ornament - activity on a slip of paper
  • Make cards for firemen/postman/librarian - stickers and paper
  • Make treats for firemen/postman/librarian - recipe for muddy buddies (one of the few items we could make without a kitchen :-)
  • Roll Advent candle - Every Sunday we make the next Advent wreath candle using supplies from this kit from etsy. Lucy needs help getting it started but can roll it pretty well with just a bit of guidance. They aren't professional looking but she is very proud of them and it is obvious she considers them her candles. 
Advent wreath with candle: 

This is pretty standard fare for anyone with a liturgical background. We do our study in the evening and Lucy tolerates it. She does better once we light the candles but overall, this part is more for Craig and I.

Prepare for Baby Jesus:

This is by far Lucy's favorite thing. I think the reason she tolerates sitting still for the devotional is that she knows this comes next. I read about the general concept of preparing a manger for baby Jesus on a Catholic mom forum but the details were sparse so I improvised. I made a manger from a pack of sculpey clay. I'd worked with sculpey before but if you haven't, the package tells all you need to know. It is easy to work with and fairly durable once baked. My manger is very homemade looking but that adds to it's charm, right? Baby Jesus was a wooden peg from Hobby Lobby painted with acrylics I had on hand. Lucy hasn't seen him yet - and I haven't exactly finished painting him yet. Right now he is a white body with a peach head. The second layer will include eyes, mouth and perhaps a halo. He will go in bag 25 to be opened Christmas day!

Every evening after we blow out the advent candles, she starts signing "baby" until we give her a little piece of "hay" (yarn). She then very carefully places it in the manger to get it ready and cozy for baby Jesus. Then we say the Come Lord Jesus prayer which for those of you who are unfamiliar with it goes something like this - "Come Lord Jesus." It's a tricky one.

 I wasn't really expecting her to care about the prayer but she gets really excited about that too, grabbing our hands and smiling when we say it. Perhaps because it is short enough that she knows it, even if she can't say it yet. This activity takes 2 minutes total but she is grinning ear to ear the whole time.

I am definitely getting to be in a more Christmasy mood now that Lucy and I are activity awaiting the celebration of the wonderful gift of "baby Jesus." I know that this will probably be the hardest Christmas season I've experienced, but it is still nice to rejoice in the wonder of the Christmas story and remember the memories my mom worked so hard to build up in our minds and hearts over the years.

5.11.2011

Simply Sewing

I like to sew but when I have the time I normally tend to gravitate towards craft projects or quilting instead of clothing. But I’ve decided there are way too many cute little girl clothes tutorials out there to waste and I was determined to give clothes sewing a bit more of my time. For my first try, I put together matching Easter clothes for Lucy and I. 
I already put up pictures but I wanted to link to the tutorials. My skirt was made using this yoga skirt tutorial. I used a 45’ cotton for the main skirt so I used two full widths, one for the back and one for the front.
For Lucy’s outfit, I could have made a matching yoga skirt but I wanted her to wear a dress. I was surprised that I couldn’t really find anything I liked. Everything had straps and we really wanted her in something with sleeves – but teeny tiny sleeves without a pattern or tutorial seemed like more of a challenge than I wanted. When I saw this tutorial I knew I wanted to do a bubble skirt and I’d seen several onesie dress tutorials before so I combined those ideas.
I followed her instructions for the bottom part of the skirt, but instead of making the straps, I sewed the skirt onto the onesie about an inch below the arm pit seams. I made it using an 18mon onesie and kept it fairly long so she should be able to wear it all summer.
110425 Lucy 054
This picture best shows the elastic bubble bottom.
The jacket I made using the same soft knit that I used for the skirt of my dress and a pattern from the bend the rules sewing book.
110425 Lucy 022
I made a kinda big mistake on both my skirt and her dress but neither one was visible so I’m still pretty happy with the results.
Next up was Lucy’s birthday outfit. I made a brown and pink tutu using this tutorial and a cupcake onesie to go with it.
110511 Baseball 101
The onesie is something I made up but I learned how to do a rosette using this tutorial.
110511 Baseball 102
Then I just cut out the rest of the pieces from various fabrics I had on hand. I was going to use wonderunder to attach them to the onesie but at couldn’t find my extra stash and it was late and night but I was determined to finish so I used fabric glue:-) I think it turned out real cute and I can’t wait for her to wear it.
None of these projects were particularly difficult so if you are looking for an easy project to get started on, I’d recommend any of them. Happy Sewing!

4.20.2011

Coming along

Lucy's room is coming along. I don't know why I'm in such a hurry with it, it's not like she is actually sleeping there yet or even knows its her room. Perhaps its because its fun to design kid rooms :-) The theme is sublte vintage farm. I know that sounds like I just stuck three artsy fartsy words together but its my vision and you can't argue with the way my brain works (just ask Craig :-)

I want to get a few more things finished before I have a full reveal but I do have another project to share. Lucy has to share her space with the office and I wanted in/out boxes but I still wanted them to work with the theme. I bounced around from idea (galvanized metal magazine racks - only available at pottery barn so way outta my budget) to idea (build white shelf to put regular bins on - boring and too much work) before I saw this post - perfect!

That tutorial is pretty good so I won't replicate it but I will say I made mine baskets smaller than hers and used wider "holed" hardware cloth so it looked a little more farmy. I thought about using chicken wire but decided that would make it tricker than I wanted to deal with.

Instead of using fabric labels I found a $0.99 pack of four wooden labels and used some leftover chalkboard paint to make mini chalkboard labels. If you don't have chalkboard paint, you might be able to get away with using black or dark grey paint since you probably won't actually need to alter the labels. Then Craig drilled teeny tiny holes and I attached them using the same wire I built the basket with. Here is one of the three:


And here is what they look like above the desk. And yes, this is what they normally look like. The "in" has a couple things, "out" is empty but "act" is overflowing. I'd say its because we've had a busy week and that is true, but it pretty much always is that full.

I'll try to finish up the last few projects in there so I can show you the whole room. I'm really starting to love it!

3.29.2011

Another checked box

Okay, so my week of finishing projects turned into my week of getting a cold and not having the energy to document and post about them. But I did finally get a picture of my ledge photo wall.


I followed Ana's plans although I changed the design from the original a tad since I wanted thinner ledges and I only made mine four feet long. Craig assisted a little bit but I did most of it myself. The ledges have been painted and installed for a while now but I've been collecting frames from thrift stores and arranging them. I finally got enough last week so I handed them over to Craig for a quick spray painting (to be truthful, two frames didn't survive the painting process so the pictures are just laying in front of them, but I have two more frames that will get painted soon to replace them).

Then I sorted through photo files to pick out my favorites. That might have been the hardest part since I am not a very decisive person and I have tons of pictures of our family that I love but I finally did it. I originally planned to do all black and whites but Craig wanted some color so I did a mix of color, black and white and sepia.

Of course, there ended up being a lot of Lucy pictures


 but I also picked a few older pictures that I love. This one of Craig in the dog house is precious.


and this is one of my favorite of my mom and I. 


It's only a little project but for my first try at woodworking, I'm really proud of how it turned out and I've already purchased the wood for my next project. Of course, I hardly needed a new hobby to keep me busy but this one is so very practical I couldn't help myself.