

Y'all ready for the second part of my series? What, you didn't know it was a series? Well, since I did do the first part two years ago, I guess I don't blame you. We have done other handicrafts in the interim but mostly I've stuck to kits. That works well for certain things. You buy a kit, you use a kit. You don't have to collect items or think up projects. There is no shame in using a kit, especially if you can add it to a gift list and you child gets it for a present! Win-win!
But sometimes, a kit is more expensive than it needs to be or you want to tailor a handicraft for your specific child or you know your child can do something but the kits for her age all seem twaddly. That was kinda where were at with embroidery. And while I haven't done much true embroidery. having done cross stitch as well as hand quilting and sewing, I knew enough to get us started, especially with pinterest and youtube at my disposal. So I thought I'd share the first few projects we did together.
Supplies:
-Burlap
-Embroidery Floss (A small variety of colors)
- Needles (I looked for metal ones that had a fairly large eye and weren't super sharp. They aren't blunt though. My kids didn't have an issue hurting themselves but we did have to be careful to keep them out of the toddlers hands)
-Linen
-Disappearing Fabric Marker
-Pencil
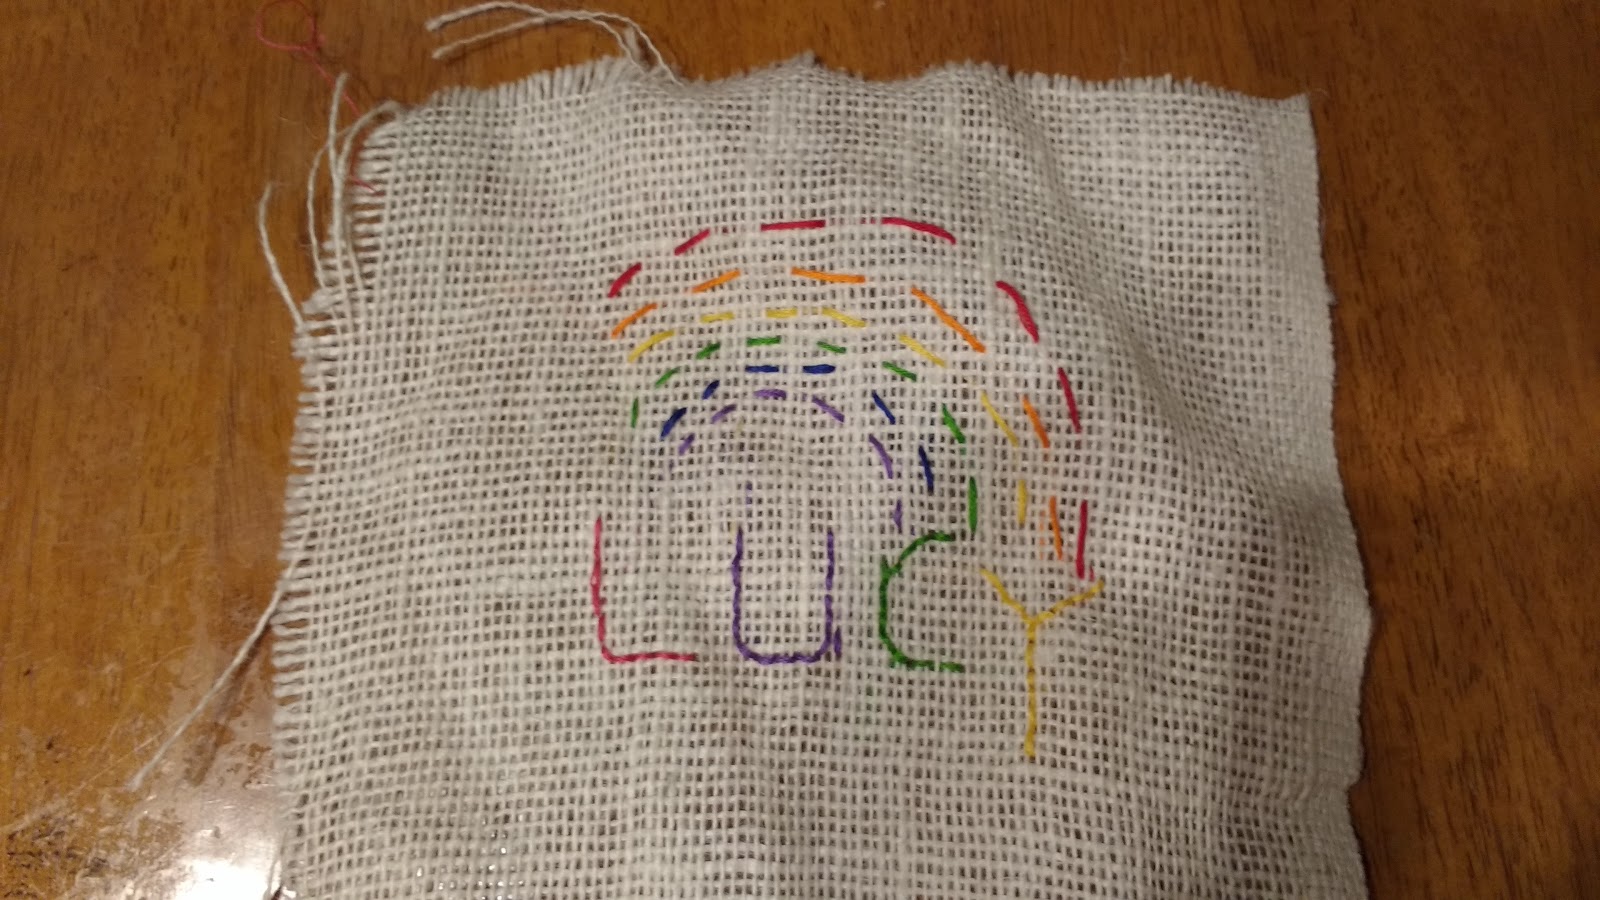
We started with learning a basic running stitch and did a rainbow. (H/T to Simple Kids Sewing for the idea). I didn't use the colored markers or stitch marking lines like they did but just gave the kids the disappearing pen to draw theirs. It's supposed to last 24-48 hrs but it must be more humid than average in our house because it seemed to start fading with an hour or two. That was okay, when they got the design they liked, I traced over the "good lines" with a pencil so the part they liked stayed and the park they didn't, faded away. Low stress for my perfectionist is a key to happy handicrafts here!
Lucy liked experimenting with stitch length to see what she preferred. After they finished their running stitch rainbow, I was going to have them do the name on a separate fabric but they insisted they go together. So we added the backstitch to our repertoire.

Yes, Jojo wrote his own name complete with his trademark backward Js. I'll be working with him on the handwriting part soon but I think the backwards J's will be our favorite part of this looking back.
Their first completed projects! Lucy wasn't completely happy with hers so she didn't want to give it away but we framed Jonah's as a gift.
Next up was free design time. We also moved to the linen fabric. Lucy drew a flower and Jonah drew a chicken (again using the disappearing marker that I then traced with pencil). I was expecting them to do more backstitching but Lucy wanted some ideas on how to fill in her flower more so I showed her the satin stitch (after I had looked it up myself) Then she was a satin stitching fool. We also did a french knot in the middle. Now she has four pretty versatile stitches at her disposal although she is already wanting more (youtube to my rescue!).

The second finished projects. This one of Lucy's was considered a success and it got framed as well. One tip is to cut your fabric several inches bigger than our frame (I find 5x7 worked well.) and then mark where that would be so your child's design stays within that. I didn't do that the first time but luckily they fit will into a standard size frame.

Framed for Grandma!
For the next set, we tried a different framing method. After a good ironing, we got it centered right where we wanted it in the embroidery hoop, cut off the edges and then I hot glued the extra fabric to the back to make it neat and tidy.

Embroidery hoops are inexpensive but I love the way they look hung up. It's also easy for the kids to see what part of the final project will be seen. We love to give our handicrafts away. If you receive one know that they've talked about you and what you would like almost the whole time they've made it. It's an honor! And it helps inspire me to take the time to get out the iron and put effort into finishing the projects which makes a big difference in how we view them. I'm really impressed by everything they've made.

For now, Jonah (4.5 yrs old) has asked to move back to the burlap for his next project. It's easier for him to see where the needle will come up. And he's happy to just use backstitch and satin stitch to complete his design, working on keeping his stitches small. He doesn't have a lot of stamina but really enjoys working for a 4-5 minutes at a time on it.
As I said, Lucy already wants to know more stitches. I've shown her project books from the library and iron on designs from the craft store with pre-designed projects but she likes designing her own things and has come up with some pretty ambitious projects but she does have quite a bit of stamina and asks for embroidery time almost daily so I think she'll be able to pull t. Her current project is a table set with plates and wine glasses. I'm not really sure where she got the idea because its not how we eat around here but I let her go with it. Now I just have to get myself a hoop and a project because I have a feeling I'm going to have to practice to keep up her!
No comments :
Post a Comment